


Trải nghiệm tại đây
https://www.facebook.com/groups/code2trade/posts/1604698500830579
🔥 VOLUME DELTA DIVERGENCE STRATEGY 🔥
Spot the Reversal. Ride the Smart Money. 🌊
💎 THE CORE CONCEPT: BENEATH THE SURFACE
This isn’t just another lagging indicator. This strategy is a “Financial X-Ray” that combines Volume Delta with the precision of Trading Hub 3.0 to catch market reversals before they even hit the news. 📉📈
📊 1. Volume Delta — The “Microscope” for Orders
Forget basic volume bars. Volume Delta deconstructs every single candle into its DNA: Buying (Up) vs. Selling (Down).
It reveals the Net Delta: Who is actually winning the tug-of-war? 🥊
By displaying this on a separate pane, you can see if the “big fish” are accumulating or dumping, regardless of the candle’s color.
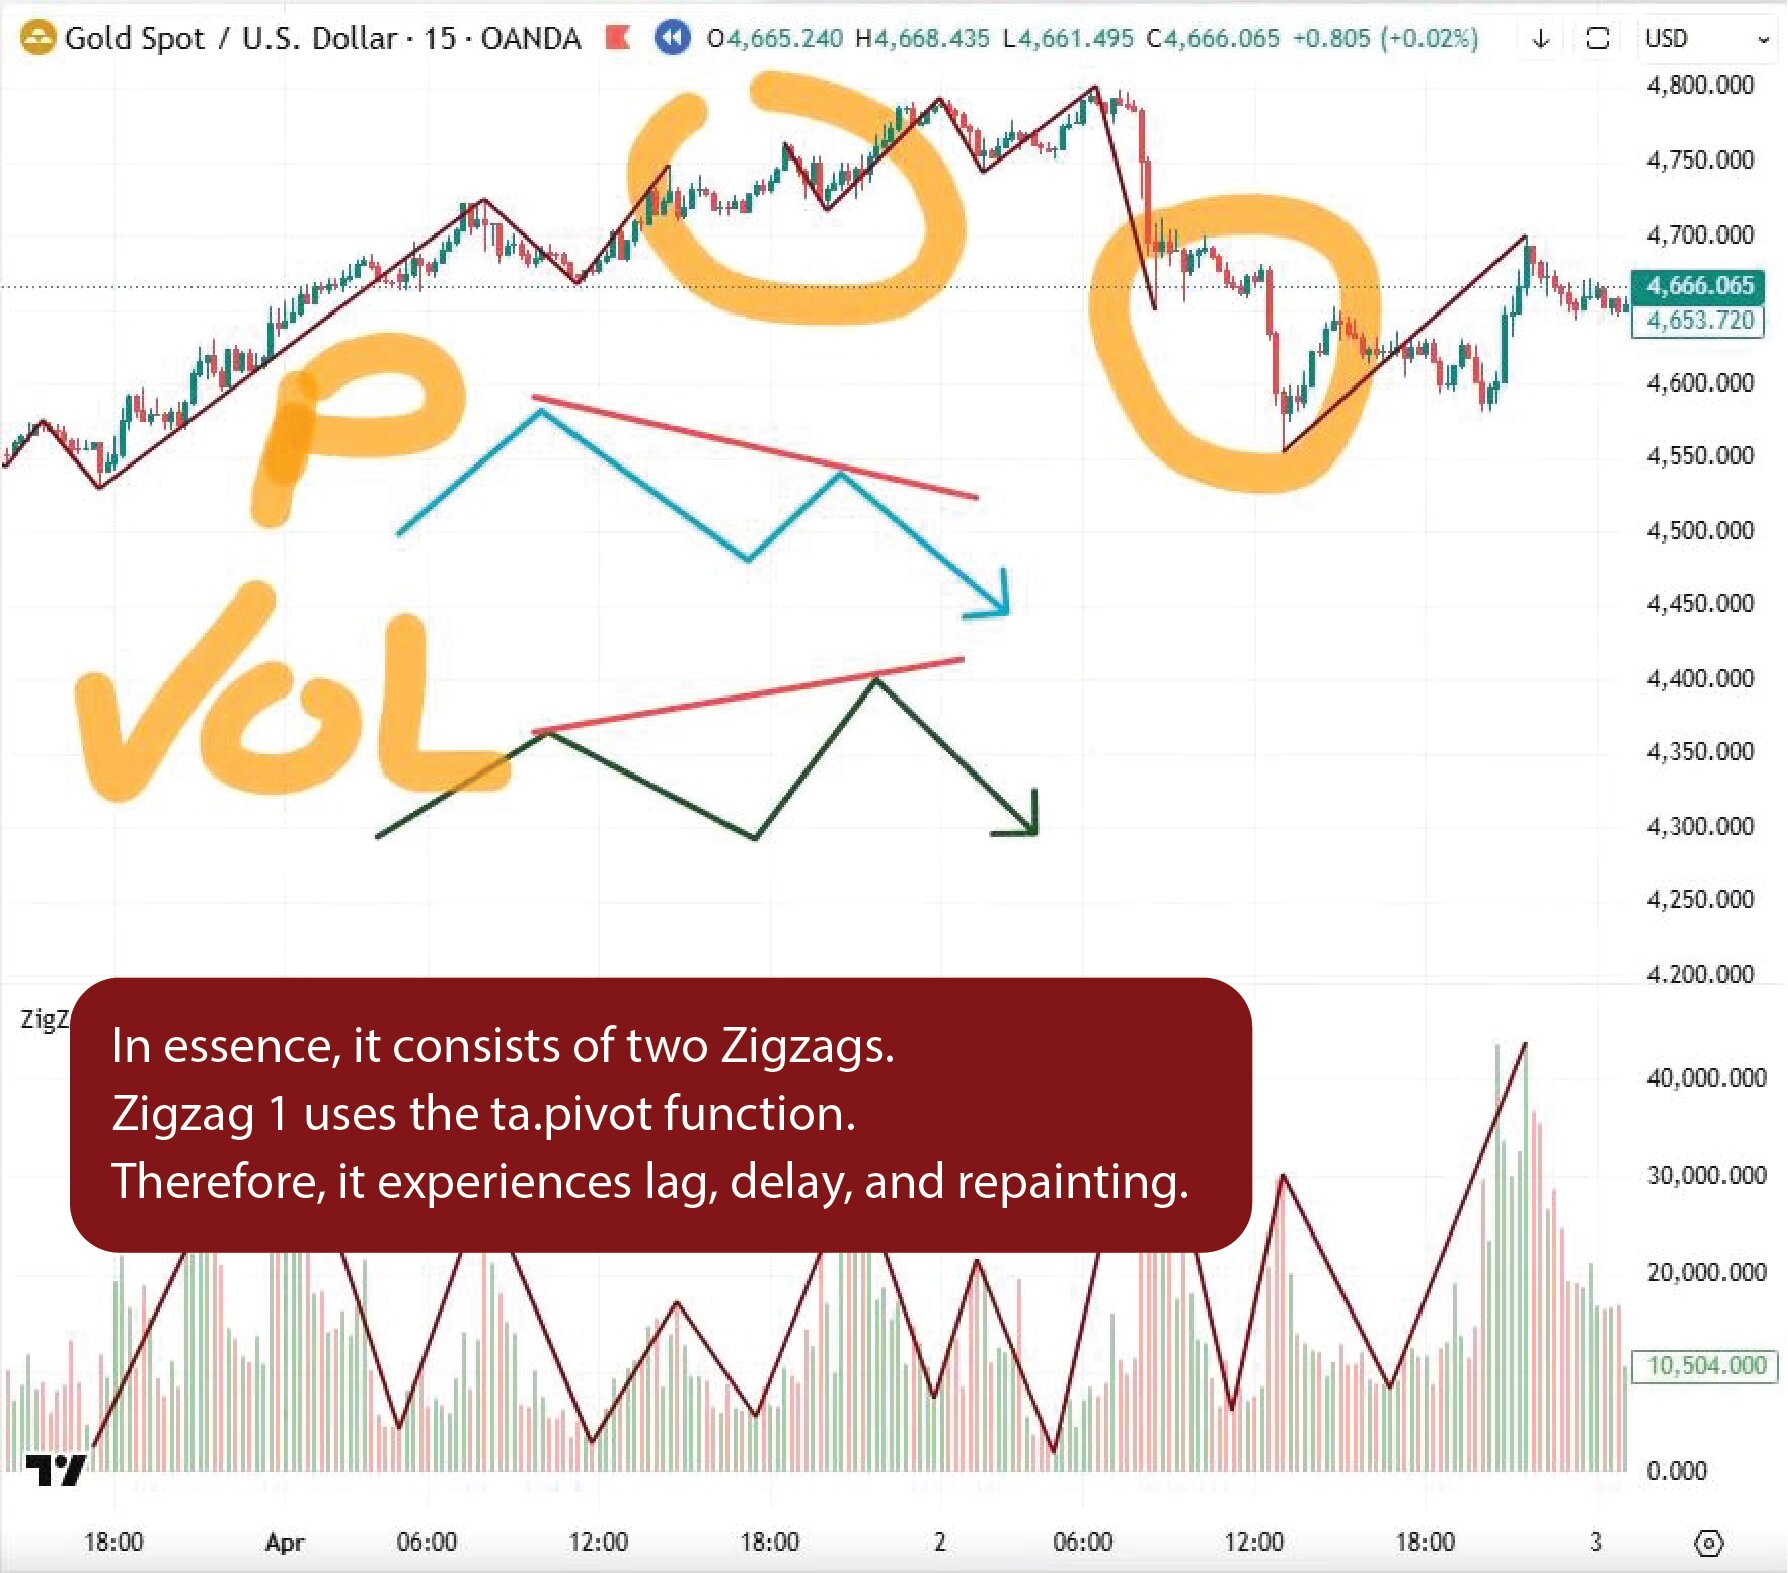
🌊 2. Swing Detection — Trading Hub 3.0 Style
No more “laggy” or “repainting” pivots that show up 5 bars too late! 🙄
We use the Trading Hub 3.0 mechanism, which classifies market structure in real-time based on candle relationships.
The Result: Confirmed swings the moment the structure shifts. You get in while others are still scratching their heads.
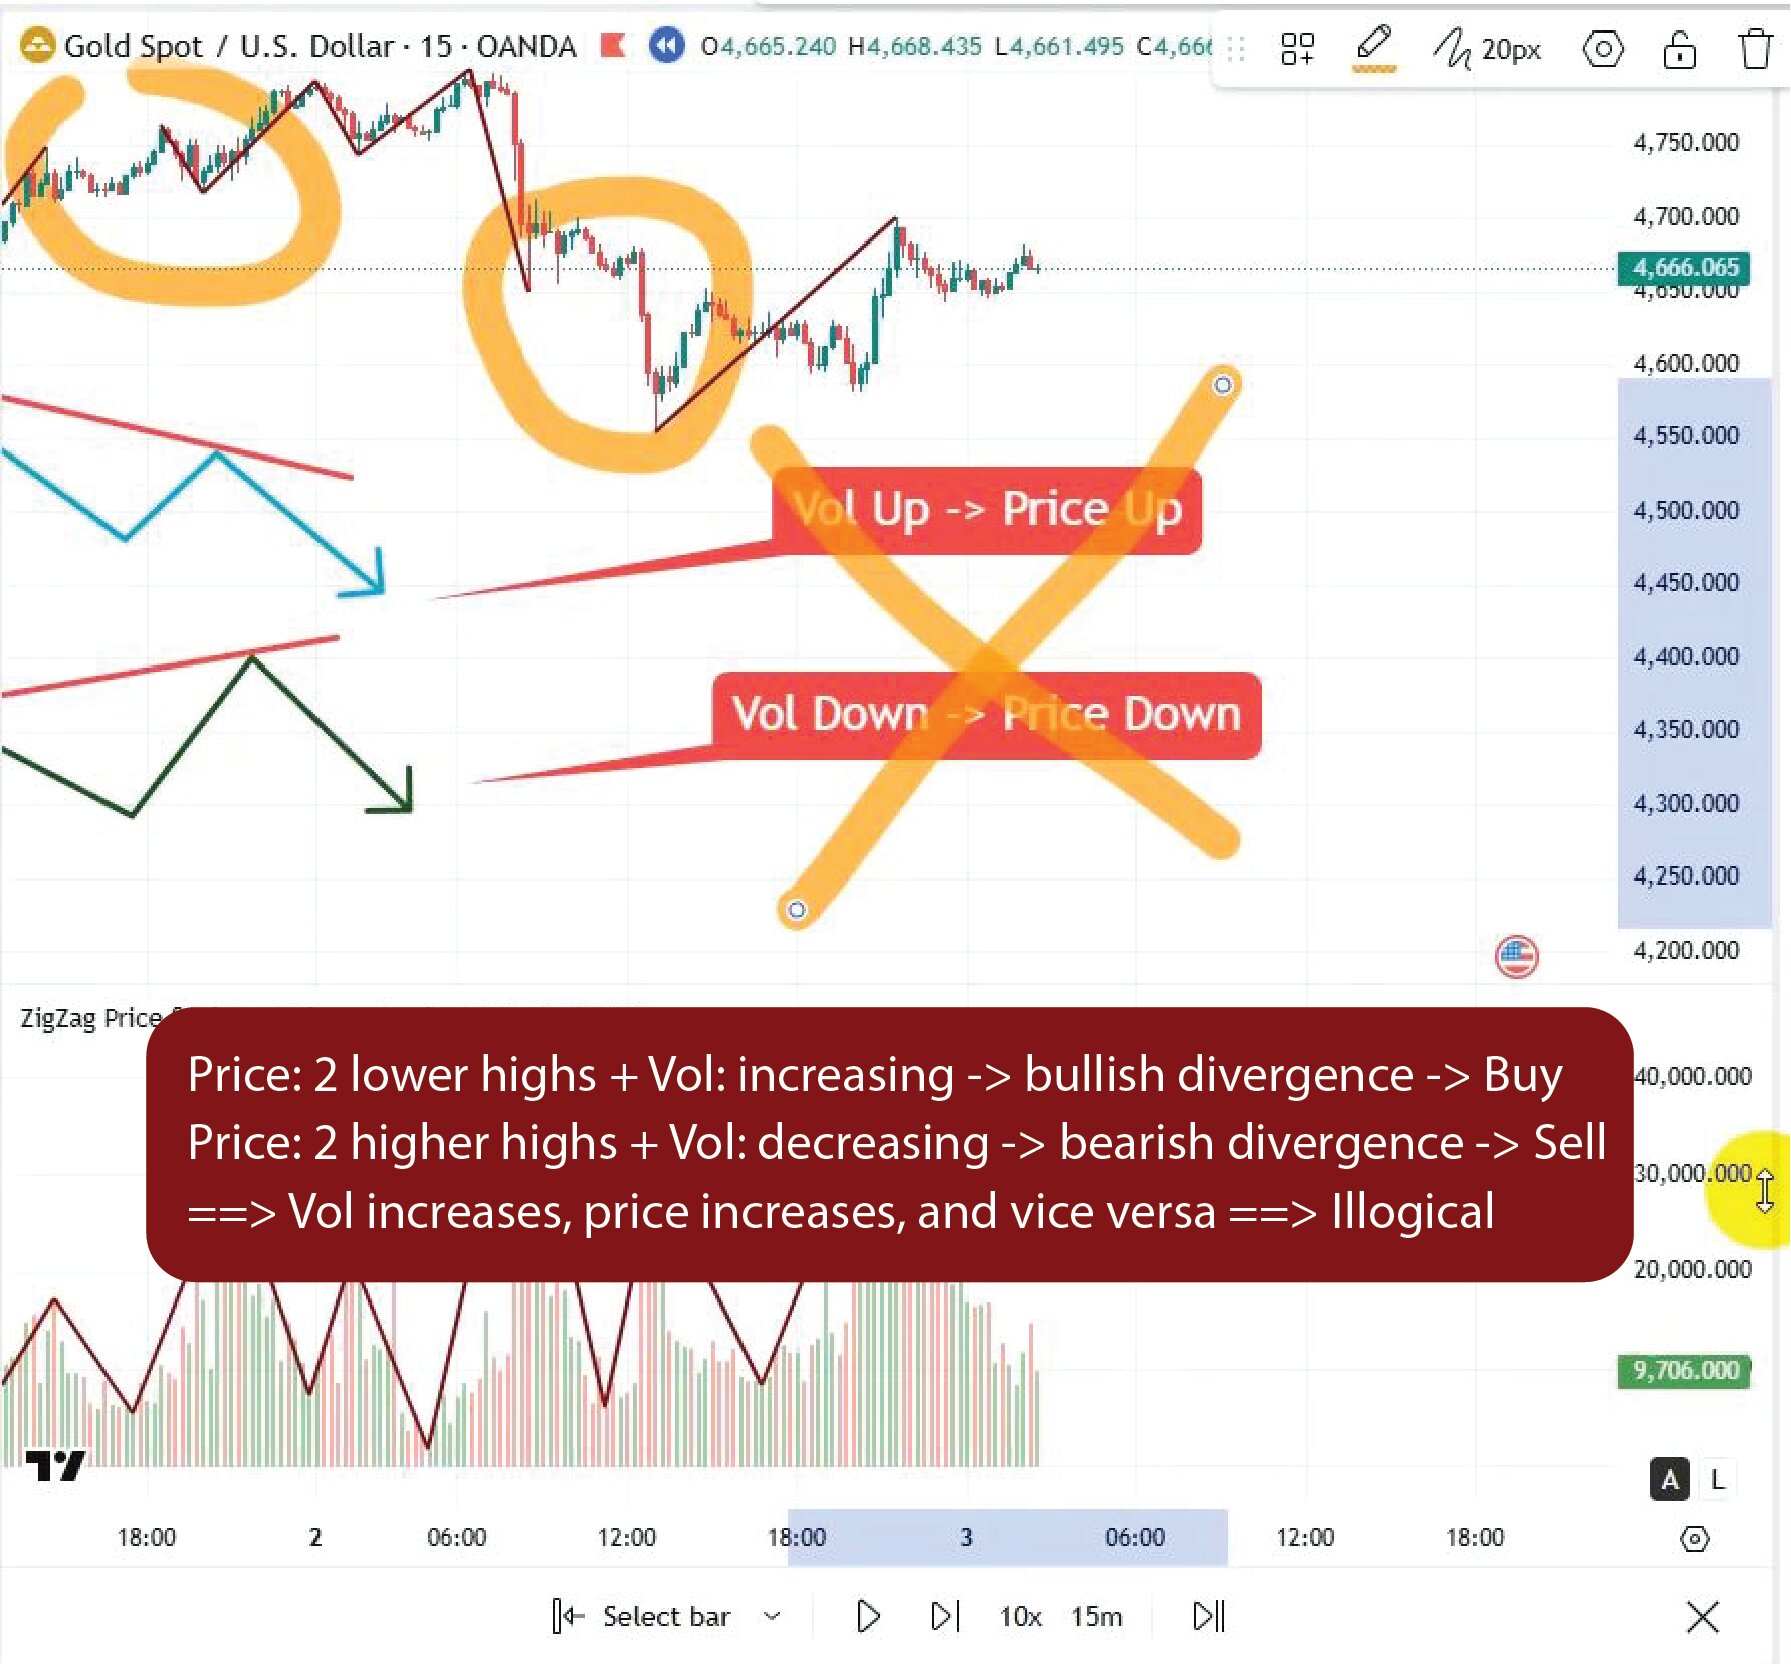
⚖️ 3. VPA & VSA Divergence
We don’t just look for price action; we look for Effort vs. Result.
Using Volume Price Analysis (VPA) and Volume Spread Analysis (VSA), the strategy detects when a trend is “running on fumes.”
When price hits a new high but the Delta shows sellers are secretly moving in? That’s your cue to strike! 💰
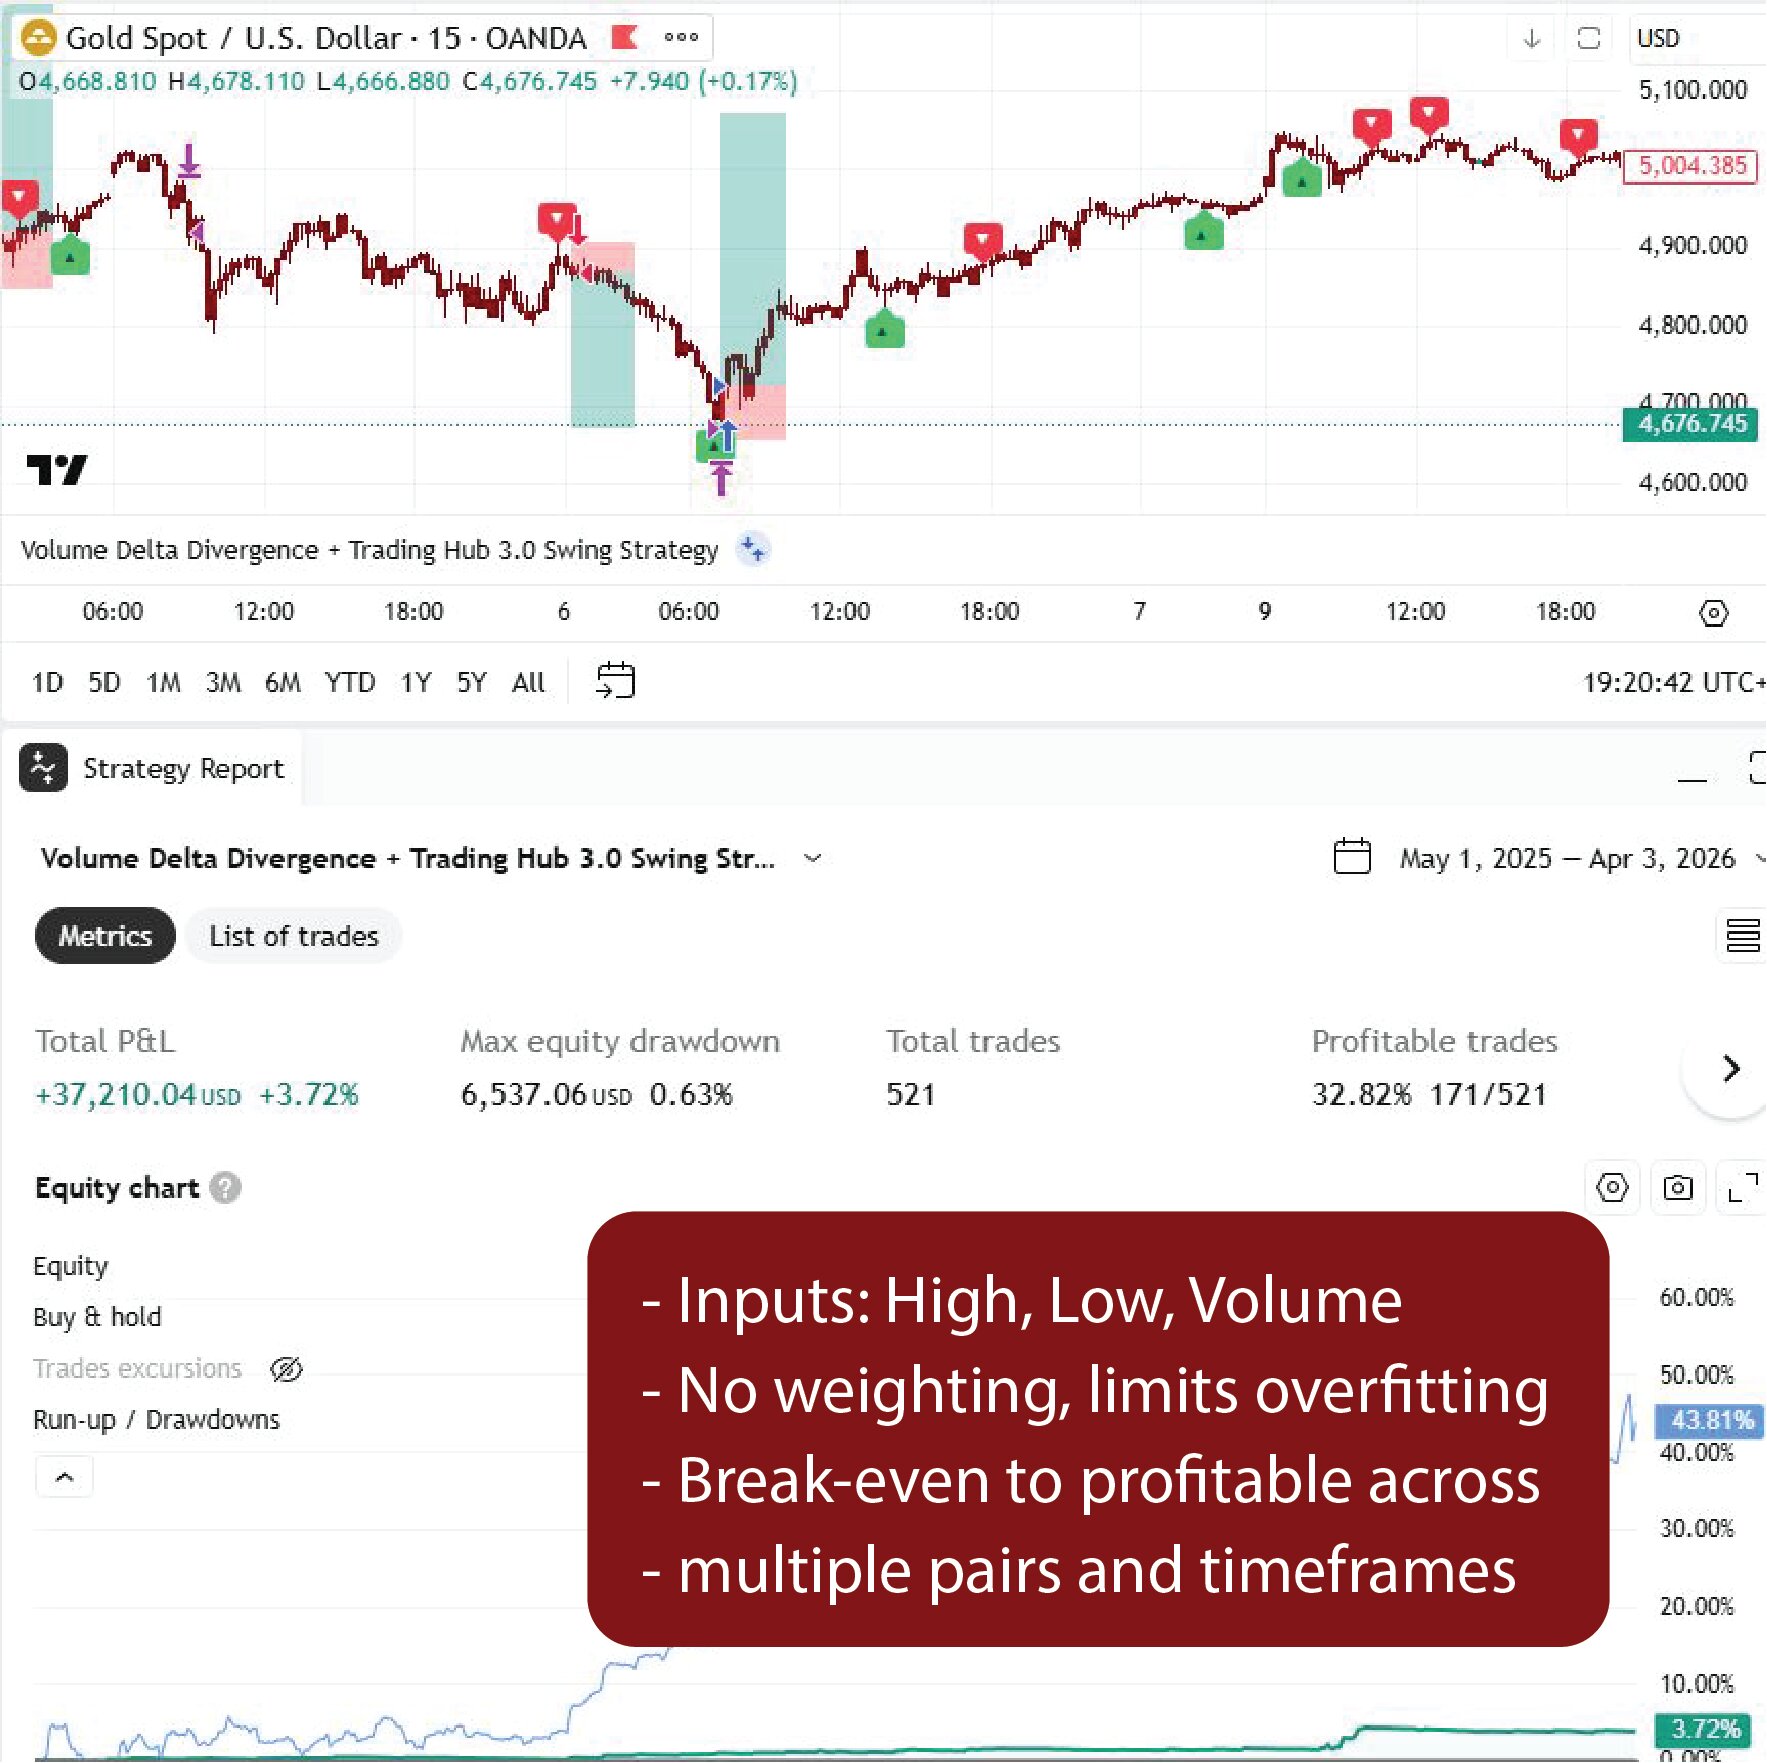
🛠️ HOW TO PLAY (THE GAME PLAN)
1️⃣ The Setup
Real Data Only: Attach this to symbols with tick or intraday volume. No synthetic “ghost” data here! 📊
Timeframe: Any! The internal “Delta Sub-chart” can even be customized for hyper-precision.
2️⃣ Reading Signals — Easy as 1-2-3 🍭
Blue ▲ Arrow: Bullish Divergence at a swing low → LONG ENTRY at candle close. 🐂
Red ▼ Arrow: Bearish Divergence at a swing high → SHORT ENTRY at candle close. 🐻
3️⃣ Iron-Clad Risk Management 🛡️
Stop Loss (SL): Placed automatically at the swing point ± a safety buffer.
Take Profit (TP): Defaulted to a 2.0R ratio (double your risk), but you’re the boss—adjust it as you like.
Break Even (BE): Once you hit 1.0R, the strategy moves your stop to entry. Protect your capital first! 🔒
4️⃣ Visual Eye-Candy 🎨
ZigZag Lines: Clearly traces the market structure so you never lose the “big picture.”
Smart Coloring: Candles change shades (dark/light) to show the current swing direction at a glance.
TP/SL Visuals: See your trade plan mapped out on the chart the second you enter.
⚠️ PRO-TIPS FROM THE DEVS
🚀 Decision Support: This is a high-grade weapon. Always combine these signals with your own market bias and key Support/Resistance zones for the ultimate “God Mode” combo.
🧪 Backtest First: Past performance is cool, but future execution is king. Trade smart and manage your size.
🔌 Data Accuracy: Volume Delta is only as good as the feed it gets. Ensure your broker provides real-time tick volume for maximum accuracy.